Adding a New Product in prestashop
Prestashop is an online store system that is freely available to the public. This system is designed with PHP programming language and MySQL database, by installing which you can create your store in a short time.
In the previous articles, we learned about Prestashop and its installation on the local environment. In this article, we want to add a product to our site.
The product page is the final destination of the customer. By seeing the specifications and information that we have entered on this page, the customer decides whether to make a purchase or not.
In PrestaShop, we can define 3 types of products:
- Standard product
- Package of products
- Virtual product
We will discuss each of them below.
How to add a product in PrestaShop?
1- First, enter your Prestashop admin panel.
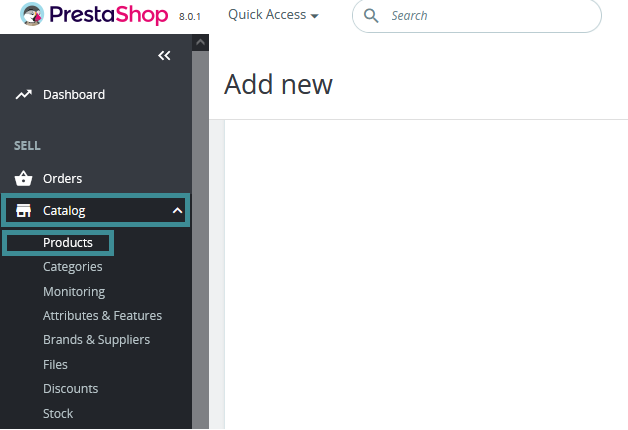
2- You will find a toolbar on the left side of the admin panel. In this bar, click on the catalog and then the products.
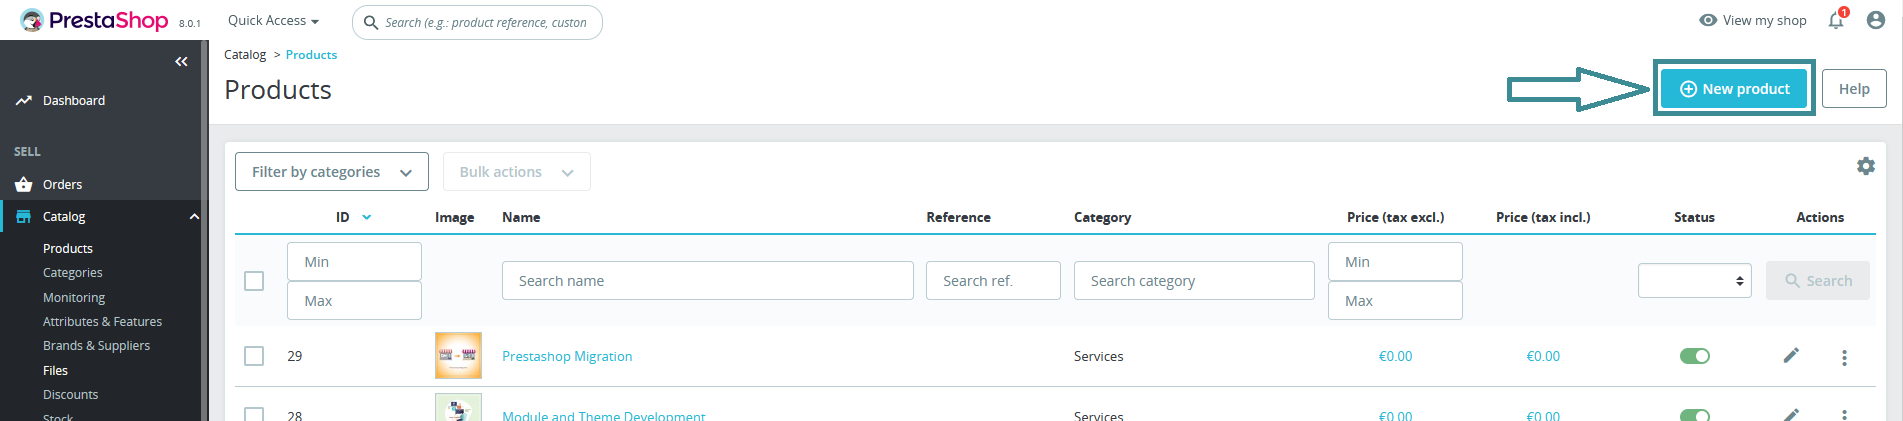
3-In the opened page as shown in the image below, click on new product. In this section, you can also use the shortcut key ctrl+p.
4- On this page, we must enter the information that we want to display to the customer about each product, which we will discuss in detail below:
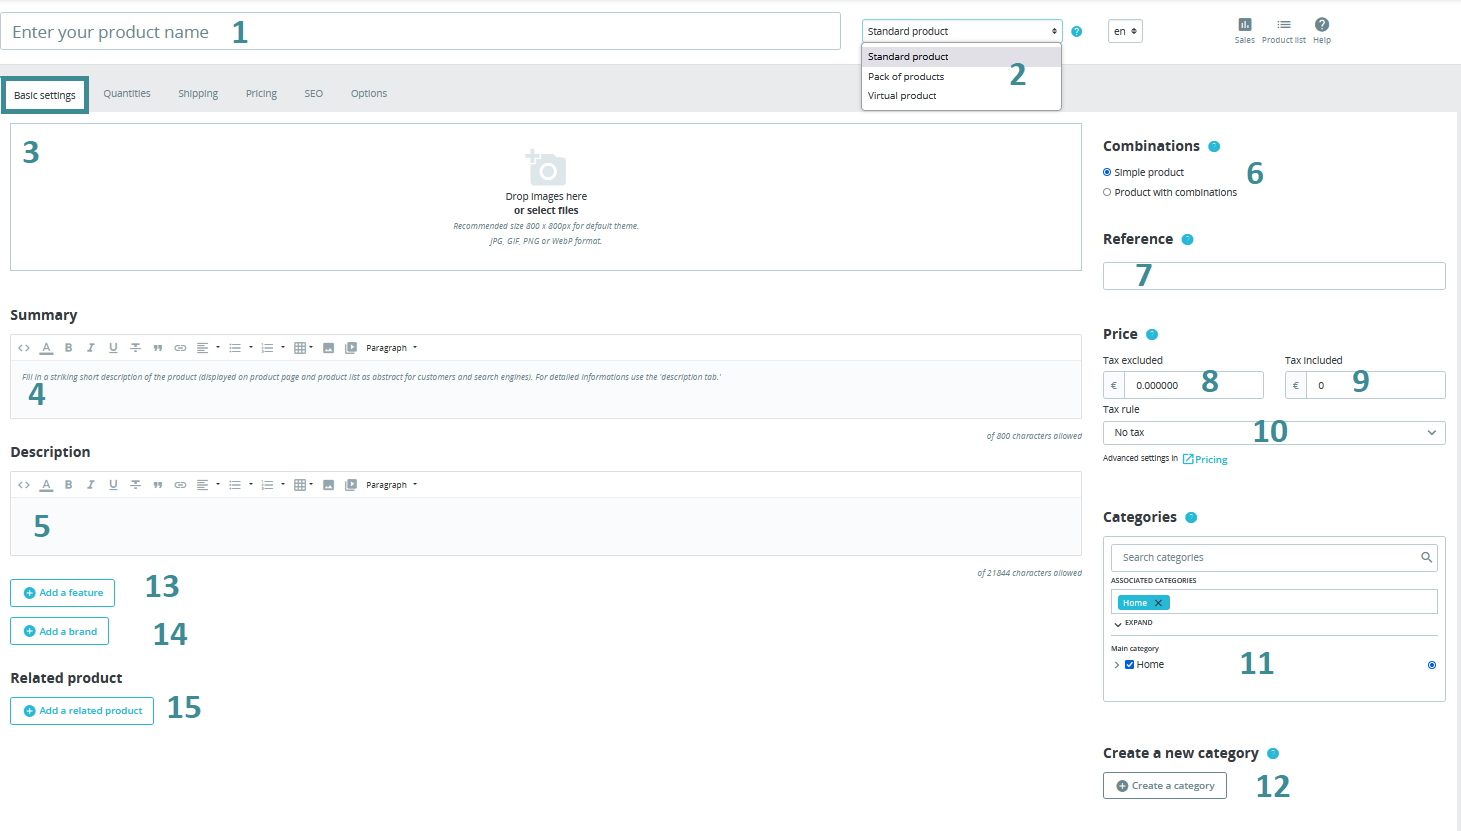
1- enter your product name
2-Specify the type of product
Standard product (physical products that must be sent to the customer)
Product package (combination of several products available in the store)
Virtual product (hotel reservation, download, etc.)
3- enter your product image
Just drag and drop the photo to this page and leave it in this section.
Note: Be careful that if your products are many and you have many photos, it is better to folder and categorize all these photos.
4- Put a summary of the product information, for example, the main and significant features that can be attractive to the user at the first moment and encourage them to continue reading.
5- Additional information about the product is placed in this section. Note that the number of characters in these two sections is limited.
6- In this section, you specify whether your products are simple or have a combination. For example, if you sell clothes, each product can have different colors and sizes, and a different price is included for each, in which case you should choose a combined product. For example, maybe you want to pay a higher price for an orange dress that has an X-large size.
7- enter Your reference code for your product.
8- enter your product price
9- Product price after tax
10- The tax percentage of your product
By entering the tax percentage, the price after the tax is automatically entered
11- Specify the category of products. First, you need to specify the branches of your products and add them from the relevant section, which we will discuss in the next articles.
12- If you have not created a category, you can create a new branch from this section.
13- If your product has special characteristics, you can categorize it from this section so that it is easier for the user to choose, for example, for skin products, the characteristics include how many grams of the product, what type of skin is it for (oily, dry, normal), special It is a special group or disease and the like. We will discuss the details of this section in the next articles.
14- It is very important for many users when buying a product brand. From this section, you can choose your product brand, of course, from another section, you must define all the brands in your store so that you can choose from this section. Also, by specifying the brand of the product, the user can search between different products of the same brand.
15- In this section, if there is a product related to this product, you select it. For example, if the product you are registering is sunscreen from a brand, in the related products section, you can add other sunscreens that you have already registered. This has two major advantages: 1- Increasing sales and customer satisfaction 2- Improving SEO
All comments
Thanks for the useful content